I'm in the process of slowly building out a home-lab.
Previously, we set up Tailscale to work as a VPN to our server to make it reachable from anywhere without compromising security. It also lets us route internet traffic through the server bypassing DNS blocking. My partner, Ni, uses it for this purpose right now while traveling.
We used the VPN to expose the server as a passive Time Machine backup target, and while very slow, it worked perfectly well.
Since the server is always reachable now, we might want to host various services. If you're reading this note, you need no convincing of the utility of self-hosting. You know that it's a great way of taking control of your data, and escape the yet another subscription trap.
Historically, self-hosting has been synonymous with lots of complicated configuration and constant management, but recently open source, self-hostable PaaS projects are becoming more popular taking care most of the management and configuration.
In this note, I will share my experience setting up Coolify with a custom data directory. I have no special relationship with Coolify, but it does appear to be a pretty solid choice.
Coolify has an excellent quick start guide for setting it up assuming a fresh server. The problem for me is that the boot disk on my server is rather small with most of the storage being a zfs pool. The quick start script doesn't support changing the storage directory for it's >30gb required space. Instead, we need to do a manual installation.
- We need to install Docker. This can be done simply by following Docker's installation guide.
- Next, we need to create a bunch of directories. Installing to a different directory mostly consists of changing the paths in the command to the appropriate directory.
mkdir -p [your-directory]/coolify/{source,ssh,applications,databases,backups,services,proxy,webhooks-during-maintenance}
mkdir -p [your-directory]/coolify/ssh/{keys,mux}
mkdir -p [your-directory]/coolify/proxy/dynamic- Then we need to copy generate ssh keys for the docker root.
One thing we need to be aware of, and which the documentation does a poor job of describing, is that Coolify doesn't really work if it's not installed for the root user. In fact, the directories we just made need to be owned by root as well.
It also means that we to run this and the following commands as root. The easiest way of doing that is by switching to the root user with su. We just need to remember to log out again.
ssh-keygen -f [your-directory]/coolify/ssh/keys/[email protected] -t ed25519 -N '' -C root@coolify- Copy ssh key to authorized hosts file.
Remember that it should be root's userfolder, so if you're not using root, you should change ~ to /root
cat /data/coolify/ssh/keys/[email protected] >>~/.ssh/authorized_keys chmod 600 ~/.ssh/authorized_keys- We are now ready to download the docker files. Again, we need to change the to the appropriate paths:
curl -fsSL https://cdn.coollabs.io/coolify/docker-compose.yml -o [your-directory]/coolify/source/docker-compose.yml
curl -fsSL https://cdn.coollabs.io/coolify/docker-compose.prod.yml -o [your-directory]/coolify/source/docker-compose.prod.yml
curl -fsSL https://cdn.coollabs.io/coolify/.env.production -o [your-directory]/coolify/source/.env
curl -fsSL https://cdn.coollabs.io/coolify/upgrade.sh -o [your-directory]/coolify/source/upgrade.sh
However, [your-path]/coolify/source/docker-compose.prod.yml contains hard-coded paths within it, so we also need to adjust those paths. We need to change all the volume paths. There are a bunch in the coolify service including a path to the .env file. There is also one in the soketi service.
- Set permissions on the data directories.
chown -R 9999:root [your-directory]/coolify chmod -R 700 [your-directory]/coolify- Generate all the environment variables
sed -i "s|APP_ID=.*|APP_ID=$(openssl rand -hex 16)|g" [your-directory]/coolify/source/.env
sed -i "s|APP_KEY=.*|APP_KEY=base64:$(openssl rand -base64 32)|g" [your-directory]/coolify/source/.env
sed -i "s|DB_PASSWORD=.*|DB_PASSWORD=$(openssl rand -base64 32)|g" [your-directory]/coolify/source/.env
sed -i "s|REDIS_PASSWORD=.*|REDIS_PASSWORD=$(openssl rand -base64 32)|g" [your-directory]/coolify/source/.env
sed -i "s|PUSHER_APP_ID=.*|PUSHER_APP_ID=$(openssl rand -hex 32)|g" [your-directory]/coolify/source/.env
sed -i "s|PUSHER_APP_KEY=.*|PUSHER_APP_KEY=$(openssl rand -hex 32)|g" [your-directory]/coolify/source/.env
sed -i "s|PUSHER_APP_SECRET=.*|PUSHER_APP_SECRET=$(openssl rand -hex 32)|g" [your-directory]/coolify/source/.env- Create Docker Network
docker network create --attachable coolifyWe are now almost ready to launch, but if we do it now, we risk getting an ssh error (Coolify is supports having multiple servers talking to each other over ssh). Remember, Coolify connects with root which is normally disabled, and you might have noticed we used a different algorithm for the ssh-keygen. So we need to adjust our /etc/ssh/sshd_config to allow for passwordless connection to root.
This sounds very dangerous, but remember, we don't expose the server directly to the internet. It will be safely protected behind a firewall connected to only via Tailscale.
In /etc/ssh/sshd_config add:
PermitRootLogin yes
PubkeyAcceptedAlgorithms +ssh-ed25519
HostKeyAlgorithms +ssh-ed25519
PubkeyAuthentication yes
We should now be able to start Coolify
Note that docker will create the volume automatically, and by default will store them in /var/docker/volumes. If this isn't what you want, you can either manually create and mount the volumes, or you can change the data-directory used by docker.
You can change the data-directory by editing the /etc/docker/daemon.json config file. Add
{"data-directory":"[your-path]"}
Note if [your-path] is a zfs volume, you also have to add, "storage-driver": "zfs".
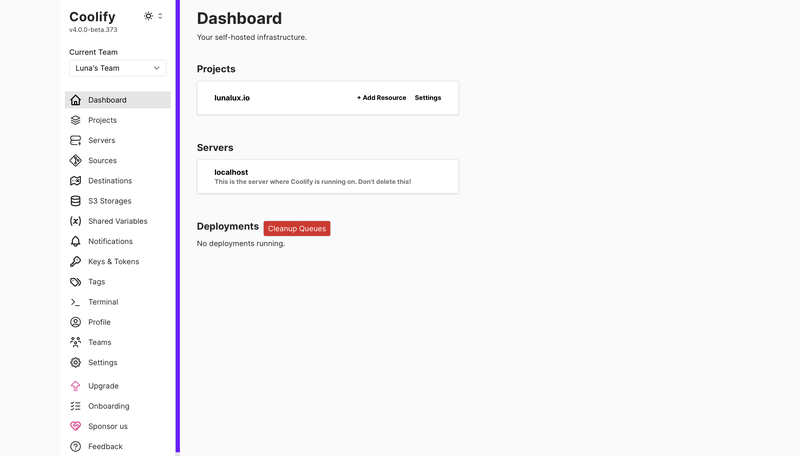
docker compose --env-file [your-directory]/coolify/source/.env -f [your-directory]/coolify/source/docker-compose.yml -f [your-directory]/coolify/source/docker-compose.prod.yml up -d --pull always --remove-orphans --force-recreateIf everything works correctly, we should be able to access Coolify on [server]:8000, and go through the setup process selecting localhost if you're just using a single server. We end up on the dashboard:

We can now install any number of services with just one click such as Plex, Libre Office, even Immich for self hosting photos and videos. You can also host services that you securely expose to the internet.